
 Английский
 中文简体
中文简体 Русский
 Español
 Português
 Türkçe
 العربية
 Deutsch
 Polski
 Italiano
 Français
 한국어
한국어 ไทย
ไทย Tiếng Việt
 日本語
日本語





























Система испытаний распыления воды с помощью осциллирующей трубки
Руководство пользователя
Применимый LISUN models: JL-34、JL-34-OT-R1000、JL-34-OT-R1200、JL-34-OT-R1400、JL-34-OT-R1600、JL-34-OT-R200、JL-34-OT-R400、JL-34-OT-R600、JL-34-OT-R800、JL-34-R1000、JL-34-R1200、JL-34-R1400、JL-34-R1600、JL-34-R600、JL-34-R800、JL-34-TT-D1000KG50、JL-34-TT-D1200KG50、JL-34-TT-D1400KG50、JL-34-TT-D1600KG50、JL-34-TT-D200KG30、JL-34-TT-D400KG30、JL-34-TT-D600KG50、JL-34-TT-D800KG50
1. Распаковка и базовое ознакомление с оборудованием.
1.1 Основные технические характеристики
| LISUN Модель | Swing Arm Radius, Turntable Diameter/Maximum Load Capacity | IPX3, IPX4 | |||
| Тестовый хост | Качели трубы | Тестовый проигрыватель | Number of holes N | Total water flow rate q | |
| ARCXNUMX | JL-34-OT-R200 | JL-34-TT-D200KG30 | R=200, D=200 mm/30 kg | 8, 12 | 0.56, 0.84 L/min |
| JL-34-OT-R400 | JL-34-TT-D400KG30 | R=400, D=400 mm/30 kg | 16, 25 | 1.1, 1.8 L/min | |
| JL-34-R600 | JL-34-OT-R600 | JL-34-TT-D600KG50 | R=600, D=600 mm/50 kg | 25, 37 | 1.8, 2.6 L/min |
| JL-34-R800 | JL-34-OT-R800 | JL-34-TT-D800KG50 | R=800, D=800 mm/50 kg | 33, 50 | 2.3, 3.5 L/min |
| JL-34-R1000 | JL-34-OT-R1000 | JL-34-TT-D1000KG50 | R=1000, D=1000 mm/50 kg | 41, 62 | 2.9, 4.3 L/min |
| JL-34-R1200 | JL-34-OT-R1200 | JL-34-TT-D1200KG50 | R=1200, D=1200 mm/50 kg | 50, 75 | 3.5, 5.3 L/min |
| JL-34-R1400 | JL-34-OT-R1400 | JL-34-TT-D1400KG50 | R=1400, D=1400 mm/50 kg | 58, 87 | 4.1, 6.1 L/min |
| JL-34-R1600 | JL-34-OT-R1600 | JL-34-TT-D1600KG50 | R=1600, D=1600 mm/50 kg | 67100 | 4.7, 7 L/min |
Оборудование соответствует требованиям испытаний IPX3 и IPX4, указанным в GB/T 4208-2017, разделы 14.2.3–14.2.4 и рисунок 4.
1.2 Распаковка и проверка содержимого
1.2.1 Распаковка и визуальный осмотр
When unpacking the device, handle it gently to avoid scratching the outer casing with sharp tools. After unboxing, first inspect the exterior of the device to ensure there is no visible deformation or dents, and that the buttons are not damaged or loose. If you notice any abnormalities with the device or its accessories, do not turn it on. Please contact us immediately.
1.2.2 Основной блок и принадлежности
Main Components of the Equipment.
| № | Внимание |
| ① | Freestanding cabinets, two in total |
| ② | поворотный круг |
| ③ | Swing pipe; a single set of equipment may include one or more swing pipes of different sizes. |
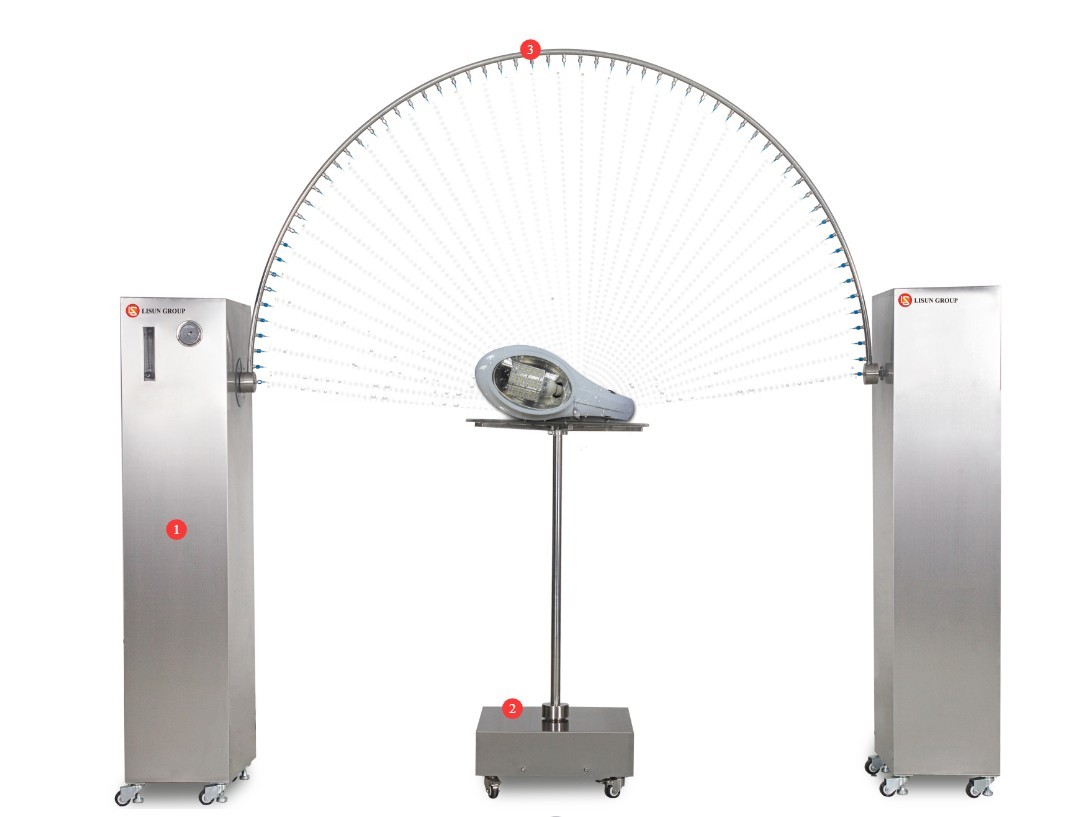
Рисунок 1
One of the freestanding cabinets contains a parts box filled with small parts, as shown in the figure below.
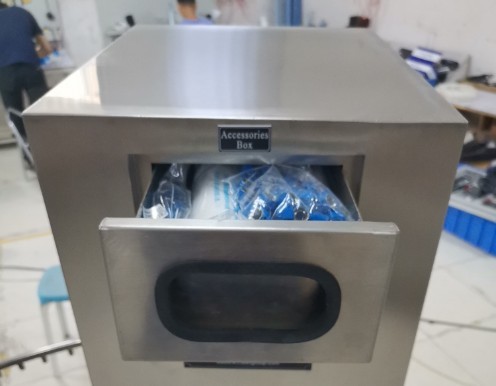
Рисунок 2
Other accessories are packaged separately; all major accessories are shown in the image below.
| № | Внимание |
| ① Water pipe | Can be used to connect to the inlet, outlet, or overflow |
| ② Waterproof Plugs and Outlets | The sample used to connect the upright cabinet to the turntable during electrical testing |
| ③ Spare filter cartridge | В устройстве уже установлен фильтрующий картридж; это запасной. |
| ④ Strap | Can be used to secure samples to the turntable |
| ⑤ Spare plug | A sufficient number of plugs have already been installed on the swing pipe; these are spares. |
| ⑥ Hex socket screws | For use when installing the swing pipe |
| ⑦ Rubber gasket | |
| ⑧Needle Passing | Если игла засорилась, используйте это средство для её прочистки. |
| ⑨Spare needles | Some needles are already attached to the needle holder; these are spares. |
| ⑩ Filter Wrench | Используйте при замене фильтрующего картриджа. |
| ⑪Clamp | For securing water pipes |
| ⑫ Hex key | For use during equipment installation and commissioning |
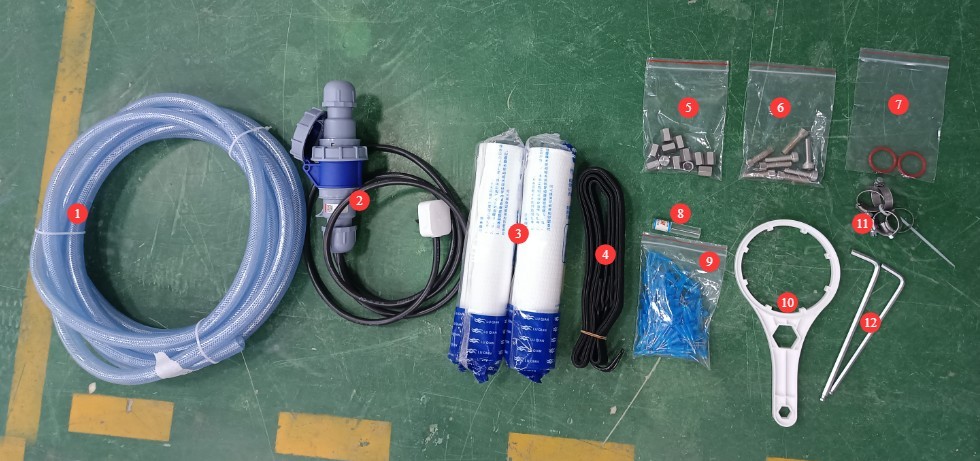
Рисунок 3
Download links for the digital user manual, software, warranty card, and other materials have been sent via email. Please download them promptly. If you missed the email, you may contact us directly to receive the download links again.
2. Меры предосторожности.
2.1 Электробезопасность
2.1.1 Технические характеристики подключения питания
В соответствии с паспортными данными подключите испытательную камеру к соответствующему источнику питания, обычно 220 В, 50 Гц (60 Гц доступно по запросу), и убедитесь в правильности напряжения и частоты. Используйте выделенную цепь, чтобы избежать совместного использования цепи с другим мощным оборудованием. Убедитесь, что все соединения надежны и не имеют ослабленных креплений.
2.1.2 Требования к заземлению
The test chamber must be reliably grounded, with a grounding resistance of ≤4 Ω. It is prohibited to use gas pipes, non-metallic water pipes, or neutral wires as substitutes for the grounding wire. After grounding is complete, use the Grounding Resistance Tester to measure the ground resistance. Power may only be applied after confirming that the resistance meets the requirements, to prevent electric shock, test chamber malfunctions, or measurement errors caused by poor grounding.
2.1.3 Electrical Operating Contraindications
Before wiring, inspecting, or maintaining equipment, you must disconnect the main power supply and confirm that there is no residual voltage before proceeding;
Во избежание поражения электрическим током не следует нажимать на выключатель питания, сенсорный экран или кнопки прибора в испытательной камере мокрыми руками;
Не размещайте внутри электрощита посторонние предметы (например, инструменты или бумагу), чтобы предотвратить короткое замыкание или повреждение компонентов из-за пыли или других посторонних предметов;
Не подключайте и не отключайте шнуры питания или сигнальные кабели во время работы оборудования, чтобы предотвратить короткие замыкания, которые могут повредить контроллер или электрические компоненты.
2.2 Эксплуатационная безопасность
When the swing tube is in operation, do not place any objects in the test area; personnel must stay well outside the swing tube’s range of motion, and must not extend their bodies or hands into the swing area; do not replace needles or plugs, or touch the swing tube, until it has come to a complete stop;
Before placing or removing a sample, ensure that the swing arm is reset to zero and the turntable has come to a complete stop; secure the sample exactly at the center of the turntable to prevent it from falling off while the turntable is rotating; the sample’s weight must not exceed the turntable’s load capacity to avoid damaging the turntable;
If the equipment malfunctions, non-professionals are prohibited from disassembling or repairing it; contact LISUN Customer Service or operate the equipment only under the guidance of a technician.
2.3. Экологическая безопасность
Sufficient clearance should be maintained between the wall and surrounding equipment (such as other test equipment and shelving) to allow for the swing of the test arm and to facilitate operation and maintenance;
Both cabinets must be placed on a sturdy, level surface. Use a level to ensure they are level, making sure the bubble in the level is centered. If the equipment is tilted, it may cause the swing arm to move unevenly or even damage the equipment. Note: The feet on both cabinets are adjustable to ensure they are level.
Другие 2.4
По любым вопросам, не охваченным данным руководством, пожалуйста, проявляйте осторожность или свяжитесь с нами.
3. Обзор оборудования и сборка
3.1 Сборка оборудования
3.1.1 Positioning of the Vertical Cabinet and Turntable
Position and align the two cabinets according to the swing arm dimensions. Be sure to leave sufficient space between the cabinets and the wall to allow the swing arm to rotate. One of the cabinets is equipped with a touchscreen; be sure to leave enough space for operation. Place the turntable exactly in the center to prevent the swing arm from colliding with it during normal testing.
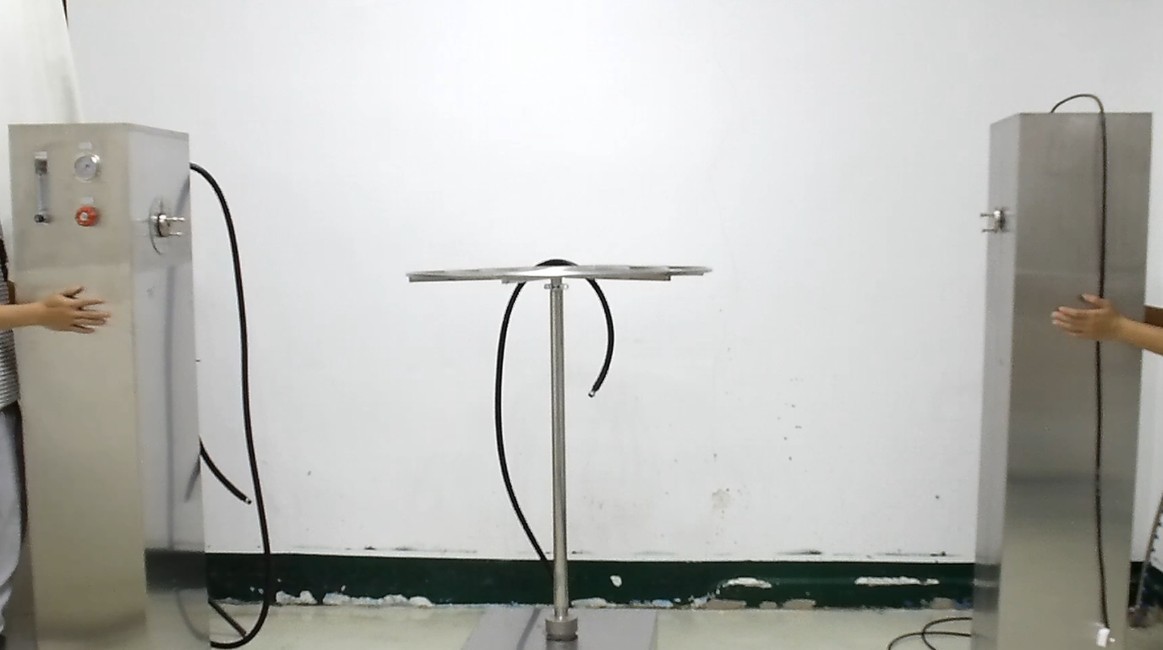
Рисунок 4
3.1.2 Swing Pipe Installation
Each of the two upright cabinets has a washer that needs to be inserted into the connection between the upright and the swivel tube.
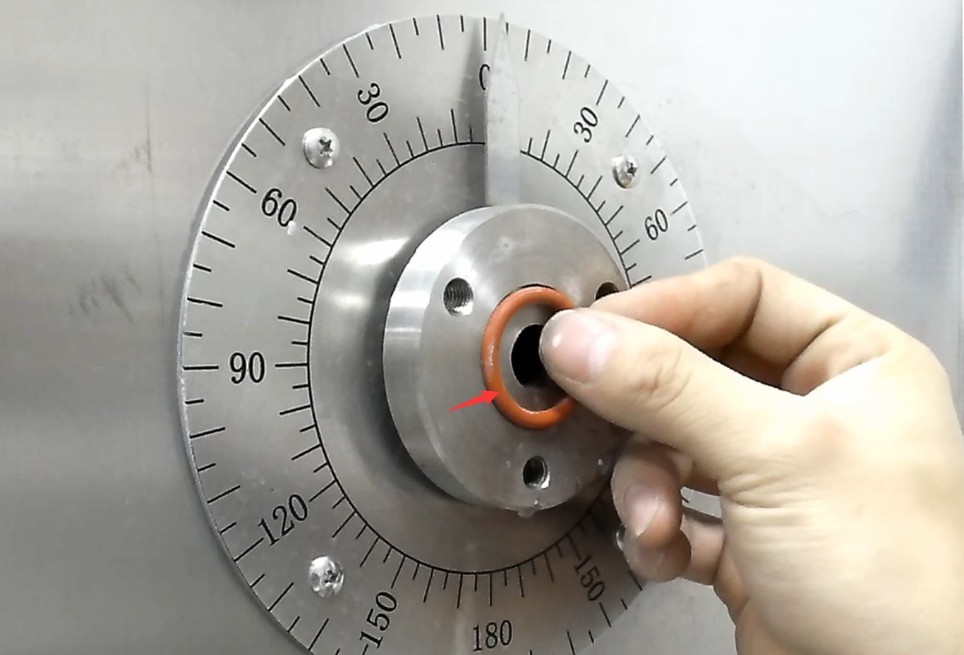
Рисунок 5
Remove the swing arm.
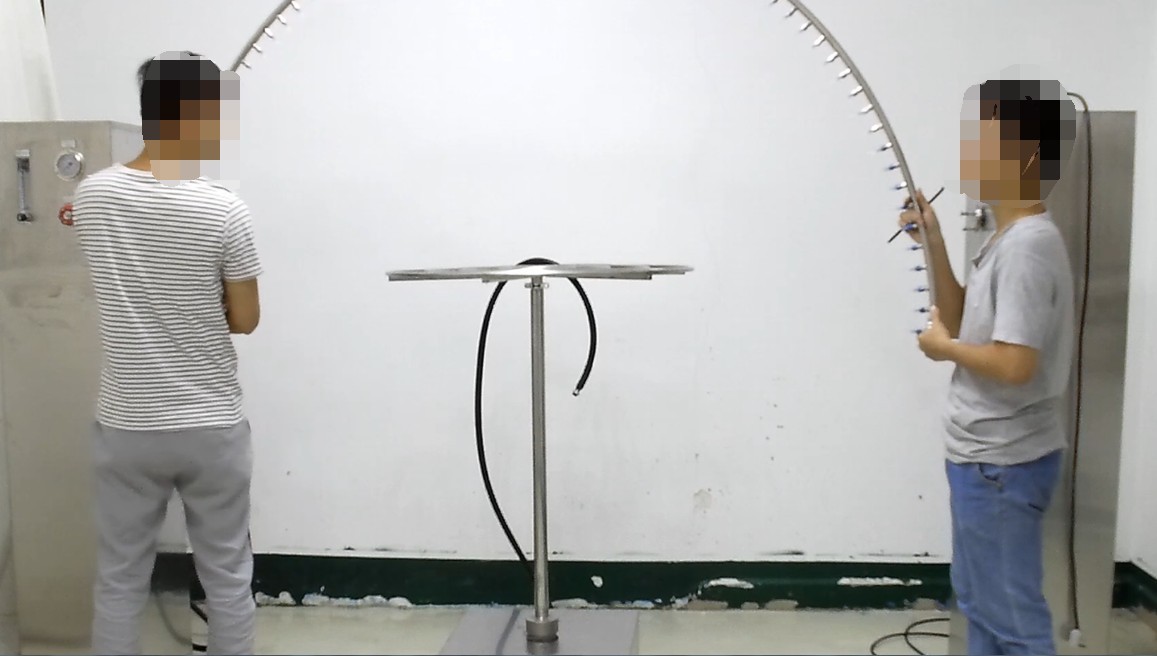
Рисунок 6
The swing pipe has an inlet at only one end.
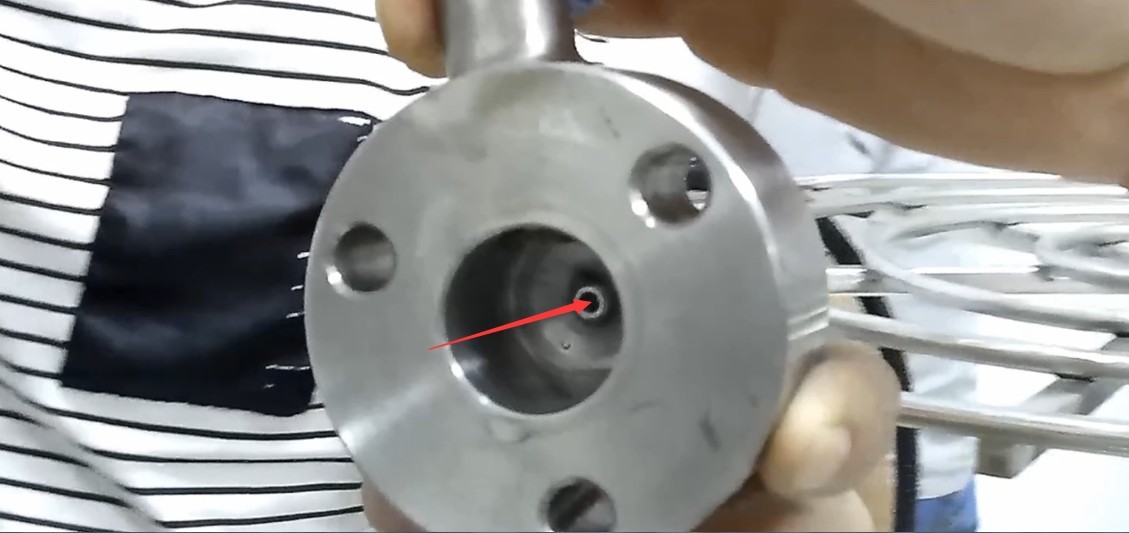
Рисунок 7
Of the two connections between the vertical cabinets and the swing pipe, only one has an outlet; connect the inlet end of the swing pipe to the outlet end of the vertical cabinet. Note: The direction of the swing pipe should match the direction of the pointer on the vertical cabinet’s angle dial.
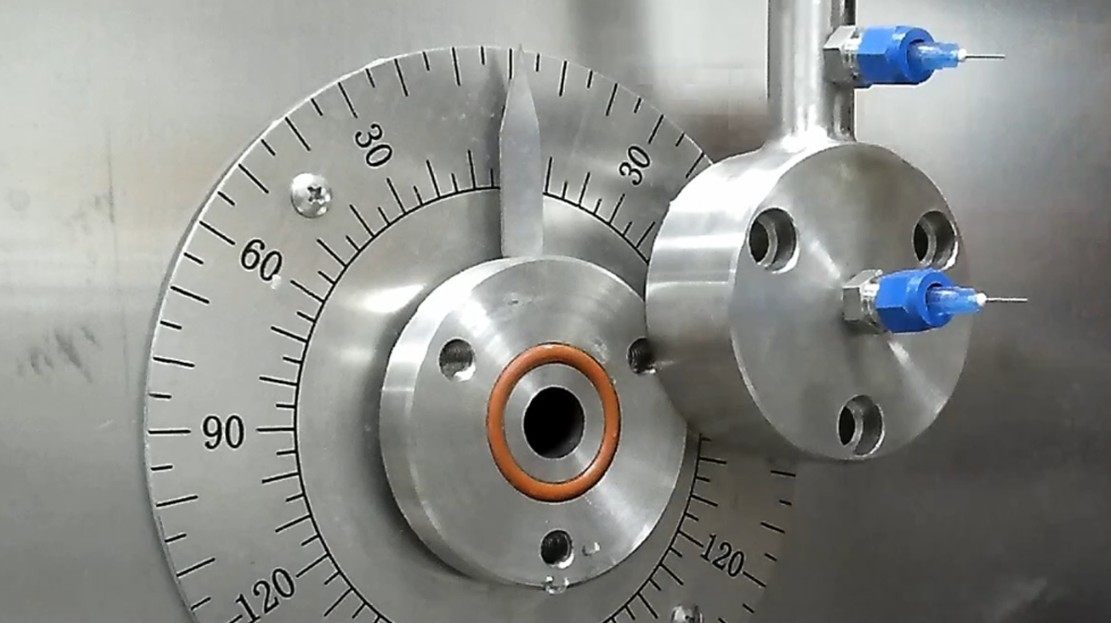
Рисунок 8
Tighten the three hex screws on each side.
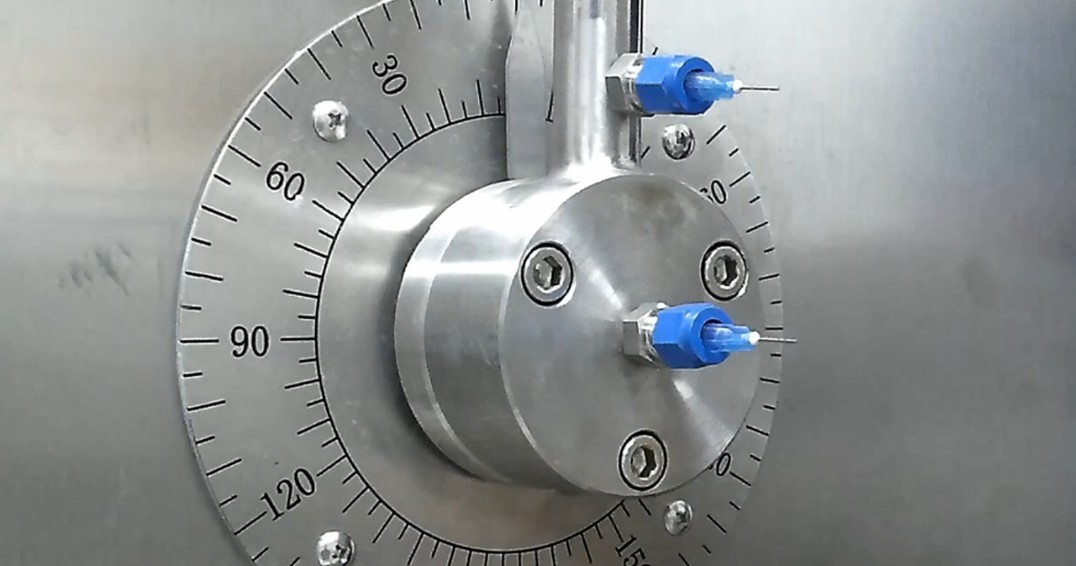
Рисунок 9
Readjust the position of the cabinet and screw the feet on the bottom of the cabinet securely in place. This will prevent the cabinet from sliding when the swing arm rotates.
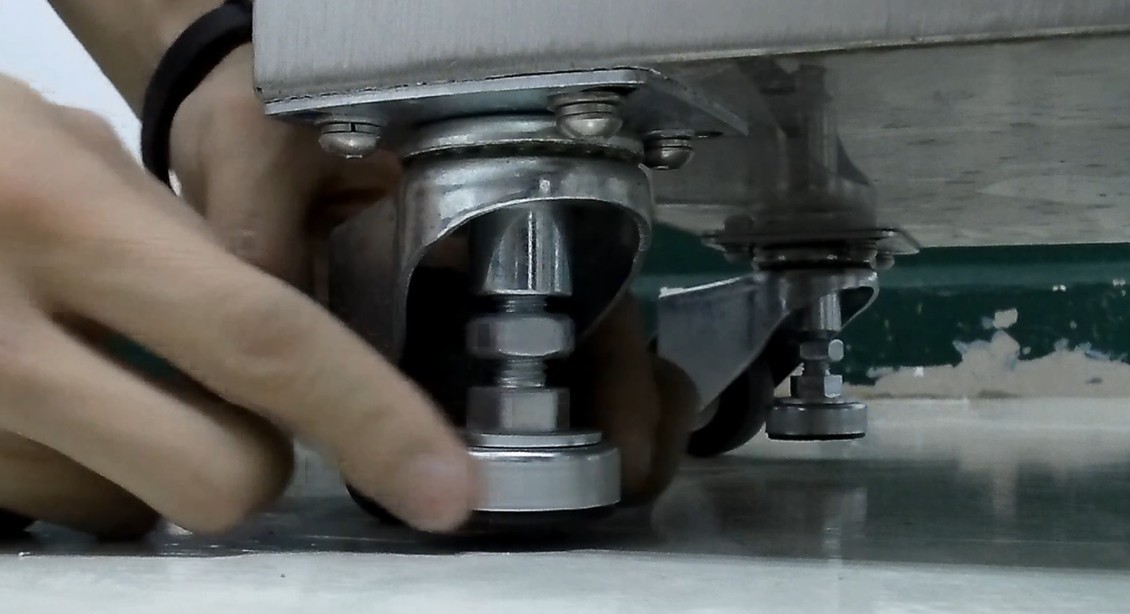
Рисунок 10
3.2 Кабельные соединения
| № | Внимание |
| ① | Device power cord. Please connect it to the correct power source according to the device’s nameplate. |
| ② | Sample power cord—please connect it to an appropriate power source based on the item being tested. Note: Abnormal conditions, such as short circuits, may occur during testing; you may connect an external ground-fault circuit interrupter here. |
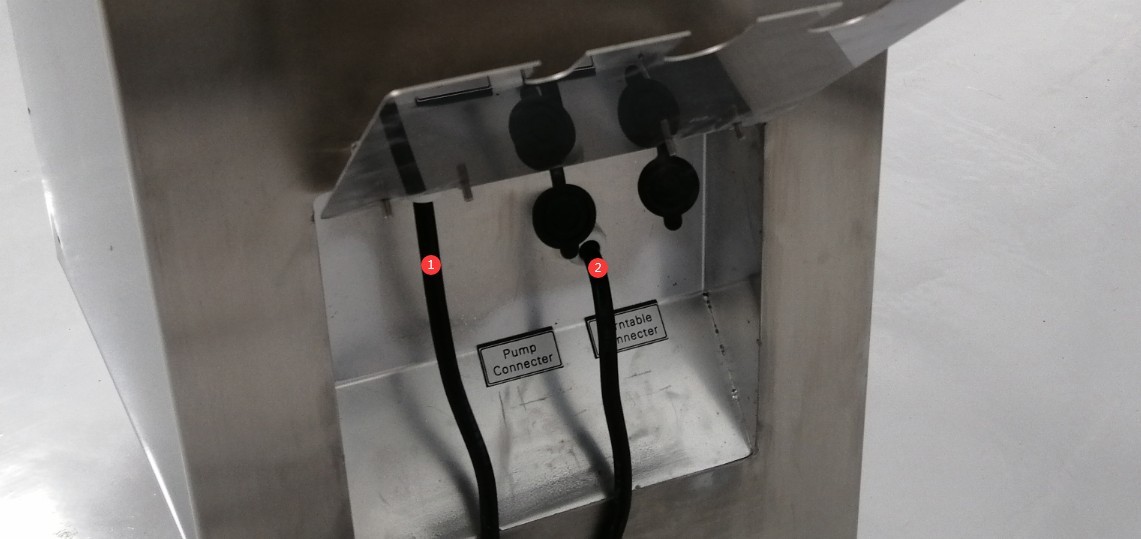
Рисунок 11
Another upright cabinet is connected to a water pump cable.
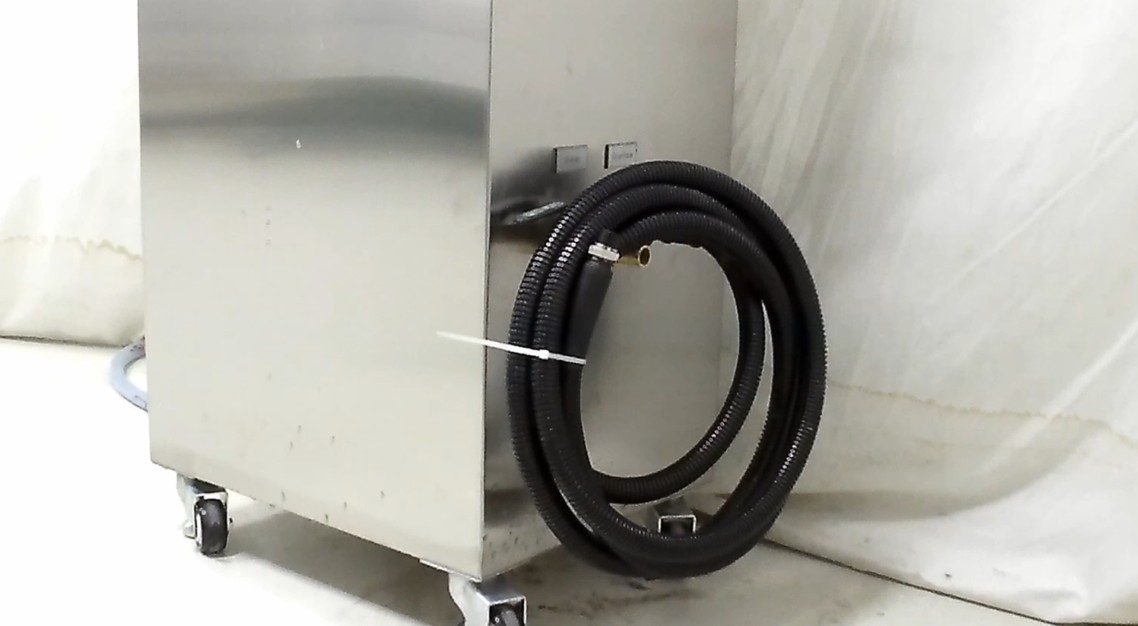
Рисунок 12
The turntable is connected to the motor cable.
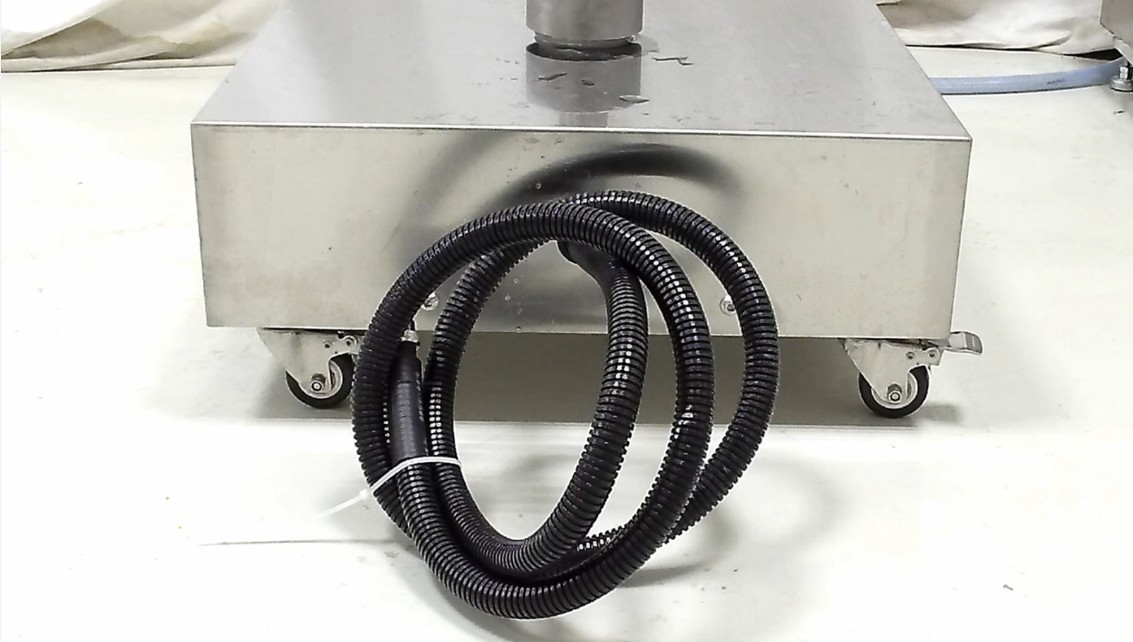
Рисунок 13
Please follow the link indicated.
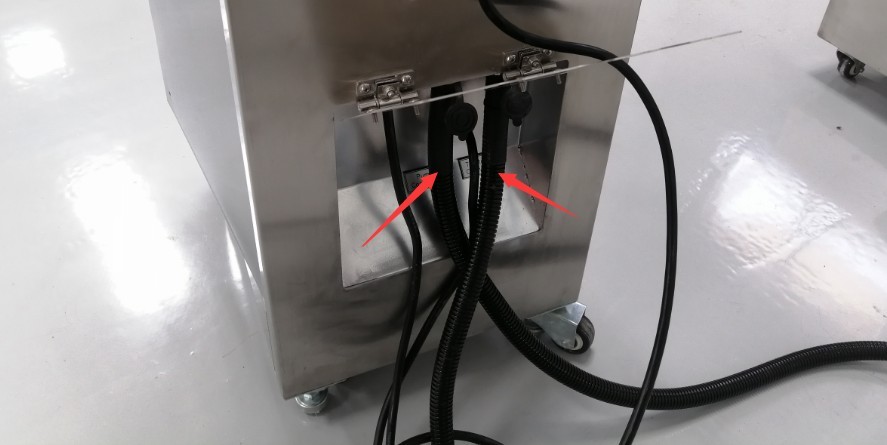
Рисунок 14
This is a waterproof plug provided by Li Shan.
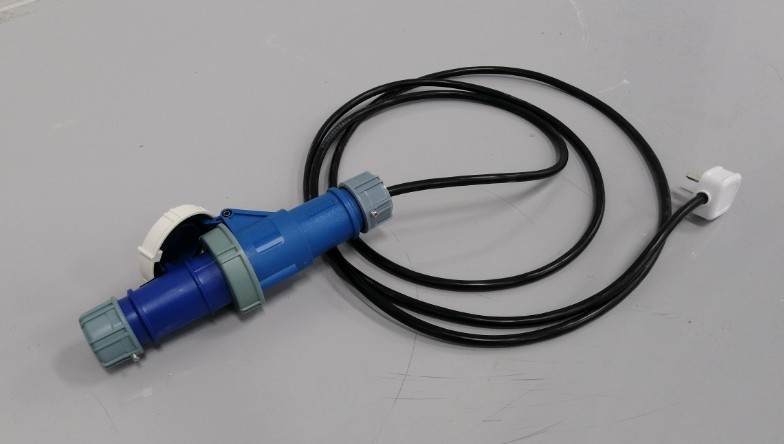
Рисунок 15
Plug one end into the outlet on the tall cabinet.
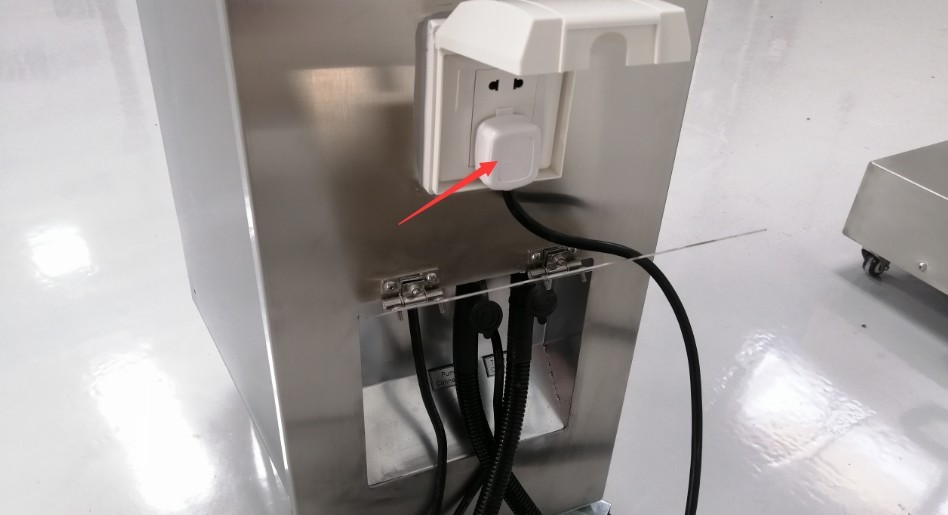
Рисунок 16
The other end is used to connect the sample. Note: The turntable automatically rotates forward and backward during the test to prevent the power cord from becoming tangled.
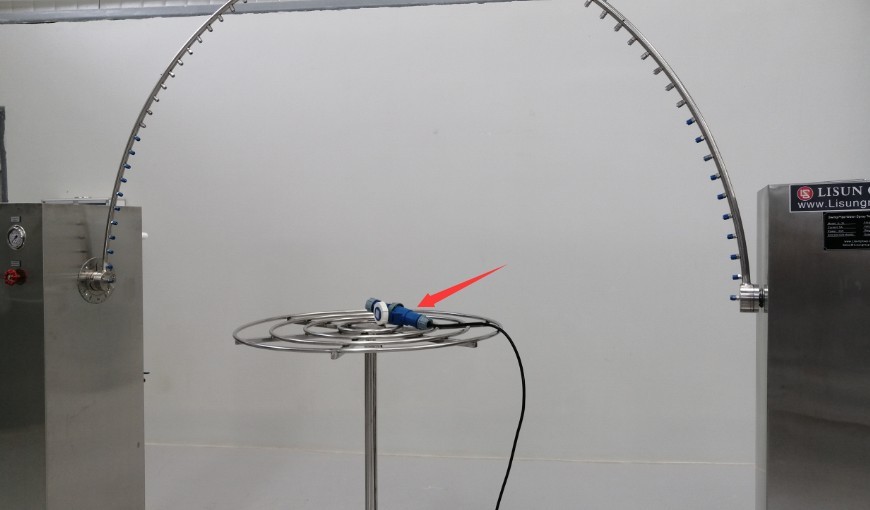
Рисунок 17
3.3 Water Tank Assembly
3.3.1 Подключение водопроводных труб
| № | Внимание |
| ① Вход | Under normal circumstances, the valve at the water inlet should remain open. There is a float valve inside the tank that automatically closes the water inlet once the tank is full. |
| ② Drain opening | Under normal circumstances, simply keep the valve closed. If the equipment will not be used for an extended period, or if you need to empty the tank, close the inlet valve and then open the drain valve. |
| ③ Overflow Outlet | Under normal circumstances, water should not overflow. If the float valve in the tank malfunctions and is unable to automatically regulate the water level, water may overflow from the overflow outlet. |
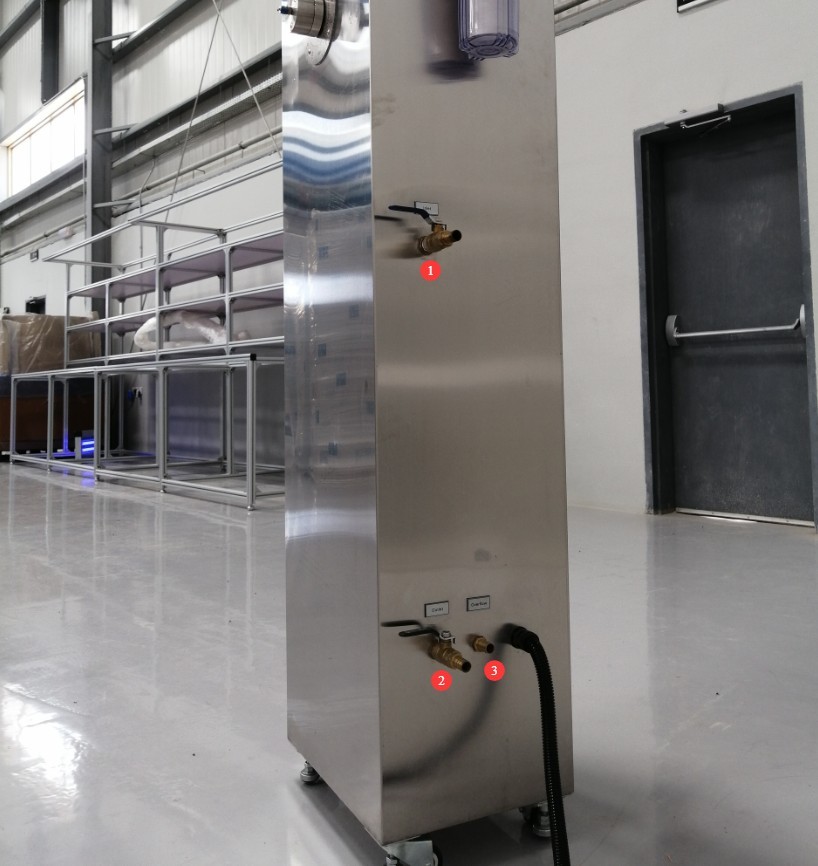
Рисунок 18
Note 1: Before using the device for the first time, please inspect the water tank and all water lines, remove any debris, and rinse with clean water.
Note 2: We recommend using deionized water or purified water (a water purifier may be used); if tap water is used, the minerals and impurities it contains can easily cause scale buildup, which affects the test water flow rate and may require frequent replacement of filter cartridges, unclogging of needles, cleaning of solenoid valves, and other maintenance—and may even damage the water pump.
3.3.2 Overview of the Water Tank’s Internal Structure
| № | Внимание |
| ① Mechanical Float | A mechanical float is connected to the inlet. As the water level in the tank rises or falls, the mechanical float moves up or down, automatically controlling the opening and closing of the inlet. |
| ② Electronic Float | There are two in total. If the mechanical float fails and the water level continues to rise, causing the upper-level electronic float to rise, the touchscreen program will trigger an alarm; if there is a water shortage in the tank and the lower-level electronic float does not rise, the touchscreen program will trigger an alarm. |
| ③ Overflow Outlet | If the water level in the tank rises uncontrollably, it will flow out through the overflow outlet. |
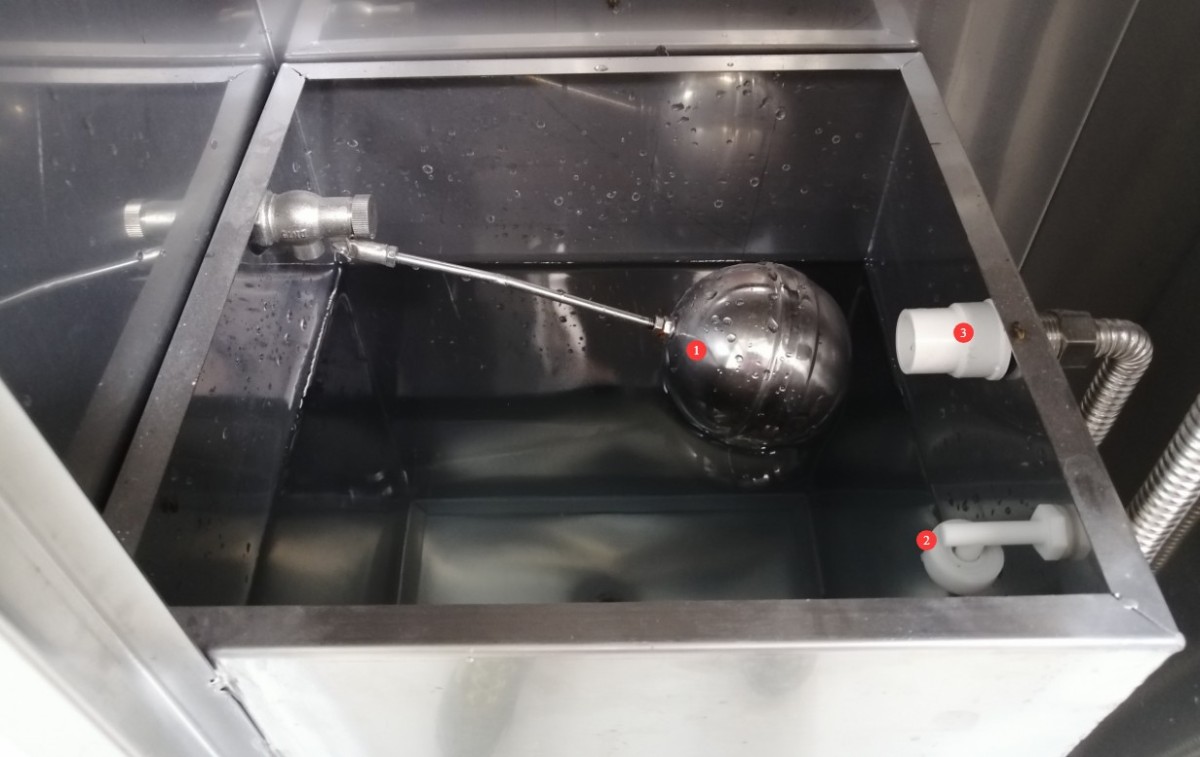
Рисунок 19
3.4 Включение оборудования
After verifying that all components are properly connected and that there are no abnormalities, turn on the device.
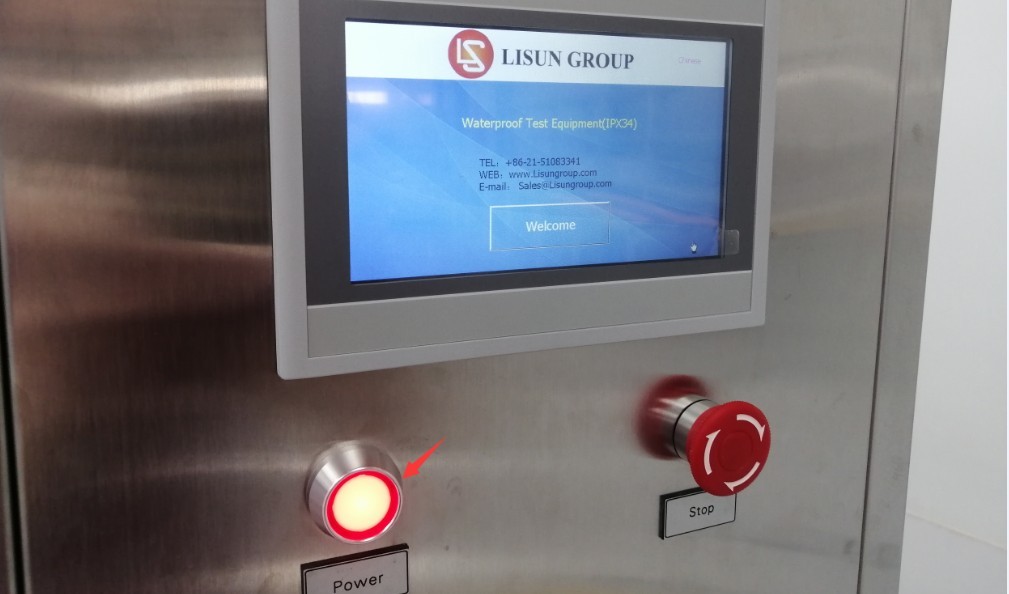
Рисунок 20
4. Введение в программу сенсорного экрана
4.1 Компоненты основного интерфейса программы
4.1.1 Пользовательский интерфейс
| № | Внимание |
| ① Степень водостойкости: IPX3 | Once selected, you can configure the IPX3 test parameters and perform the IPX3 swing-nozzle spray test. |
| ② Степень водостойкости: IPX4 | Once selected, you can configure the IPX4 test parameters and perform the IPX4 swing-nozzle spray test. |
| ③ Sample Power Supply | Питание образца можно включать и выключать. При включении питания образца для тестирования программа будет автоматически подавать питание на образец в соответствии с временем включения/выключения, заданным в интерфейсе настроек параметров. |
| ④ Test Parameters | Нажмите, чтобы перейти к экрану настроек параметров теста. |
| ⑤ Factory Settings | При нормальной работе оборудования нет необходимости входить в режим отладки. Если параметры тестирования оборудования отклоняются от нормы, вы можете войти в режим отладки. Для этого потребуется пароль; пожалуйста, свяжитесь с нами. |
| ⑥ Manual Window | Before the official test, you can check in the manual window to confirm that all device functions are working properly. |
| ⑦ Clear and Reset | Перед началом теста нажмите здесь, чтобы очистить данные предыдущего теста. |
| ⑧ Return the swing arm to zero | If the pendulum is not in the 0-degree position (directly above), click it to reset it to zero before the test. |
| ⑨ Start the Test | Click to start the swing-arm rain test |
| ⑩ Test stopped | Click to stop the swing-arm rain simulation test |
| ⑪ Test Duration Display | Отобразить текущую продолжительность теста |
| ⑫ Standard Flow Display | Displays the standard water flow rate required for the current swing arm size and waterproof rating |
| ⑬ Sample exposure time | Отобразить текущую продолжительность включения питания для данного образца. |
| ⑭ Power-off time for the sample | Display the duration of the power outage for the current sample |
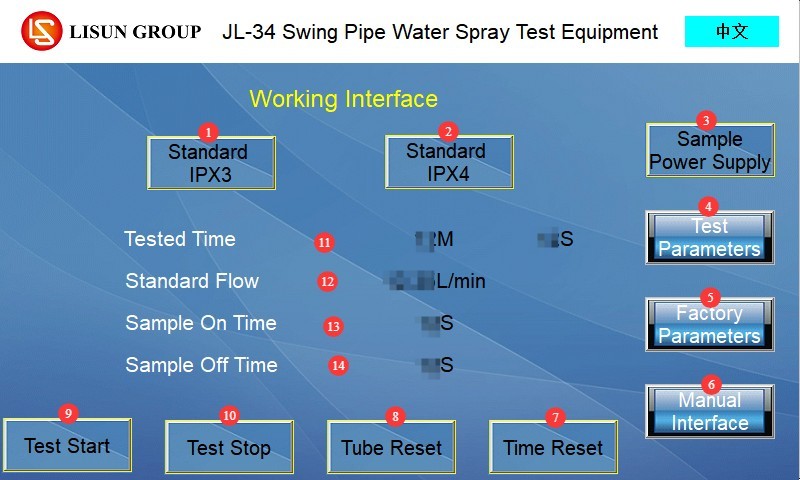
Рисунок 21
Note: If your equipment includes multiple swing pipes, you must select the size of the swing pipe currently in use on this screen.
4.1.2 Интерфейс настройки параметров
| № | Внимание |
| ① Продолжительность теста | Общую продолжительность испытаний можно установить; стандарт GB/T 4208-2017 устанавливает, что продолжительность испытаний как для IPX3, так и для IPX4 составляет 10 минут. |
| ② Swing Angle | The IPX3 standard is set at 120°, the IPX4 standard at 350°, with an upper limit of 350°. |
| ③ Turntable Speed | Unit: r/min; adjustable from 1 to 5 r/min; factory default is 1 r/min; no adjustment is required for standard testing. Note: During IPX3 testing, in accordance with the standard, the turntable will automatically rotate to two angles, and the test is conducted with the sample at rest; During IPX4 testing, the turntable rotates continuously at a speed of 1 r/min. For samples that require power during testing, the turntable automatically rotates in both clockwise and counterclockwise directions to prevent the sample’s power cord from becoming tangled. |
| ④ Time the sample is energized | Set the duration for which the sample remains energized during the test, in seconds |
| ⑤ Time the sample is de-energized | Set the duration of continuous power interruption for the sample during the test, in seconds |
| ⑥ Назад | Нажмите, чтобы вернуться к рабочему интерфейсу. |
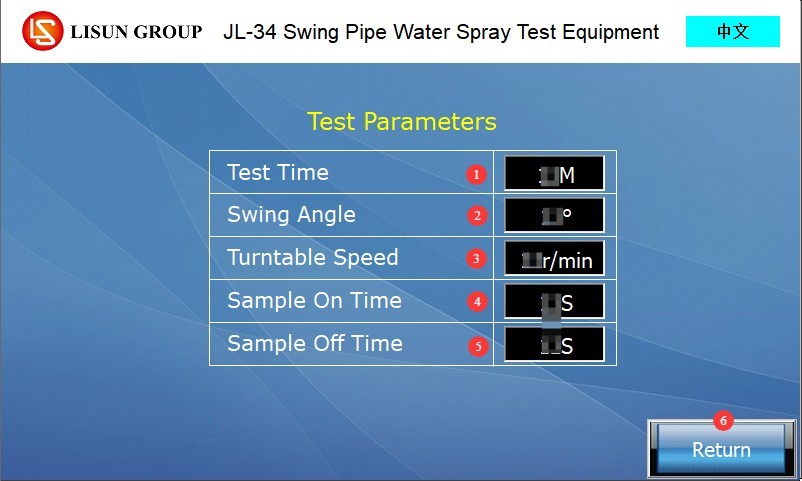
Рисунок 22
Note: Continuous power supply: Power-on time = test duration; power-off time = 0 s; No power supply: Power-on time = 0 s; power-off time = test duration.
4.1.3 Окно ручного управления
| № | Внимание |
| ① Pump Switch | The water pump can be turned on or off; once turned on, water begins to flow into the swivel pipe at the flow rate set by the flow meter. |
| ② Пример источника питания | Если источник питания образца и образец соединены, вы можете включать или выключать источник питания образца. |
| ③ Forward rotation of the swing pipe | Click to rotate the swing arm clockwise or counterclockwise; release to stop. Be careful not to let the swing arm collide with the turntable. |
| ④ Swing Arm Reversal | |
| ⑤ Turntable rotating clockwise | Click to rotate the turntable clockwise or counterclockwise; release to stop. Note: If there are wires between the turntable and the sample, do not rotate in one direction for an extended period to prevent the wires from becoming tangled. |
| ⑥ Реверс проигрывателя | |
| ⑦Назад | Нажмите, чтобы вернуться к рабочему интерфейсу. |
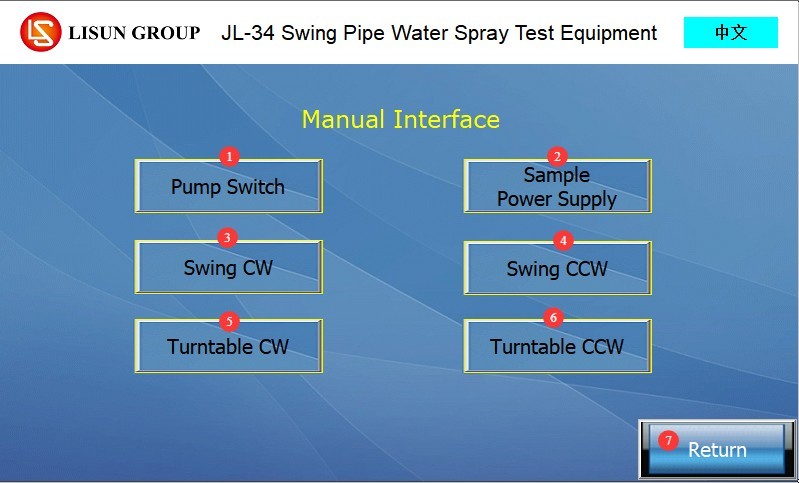
Рисунок 23
4.2 Описание интерфейса программной сигнализации
Кнопка аварийной остановки не сброшена. Пожалуйста, поверните кнопку аварийной остановки по часовой стрелке, чтобы сбросить ее, затем повторите попытку.
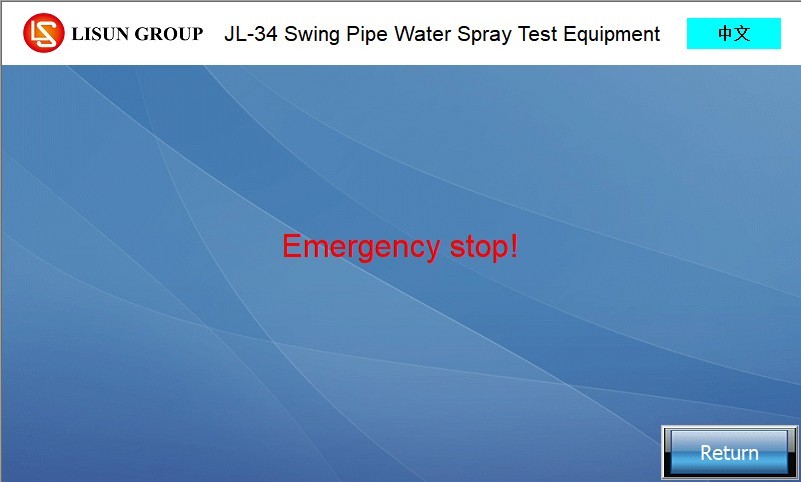
Рисунок 24
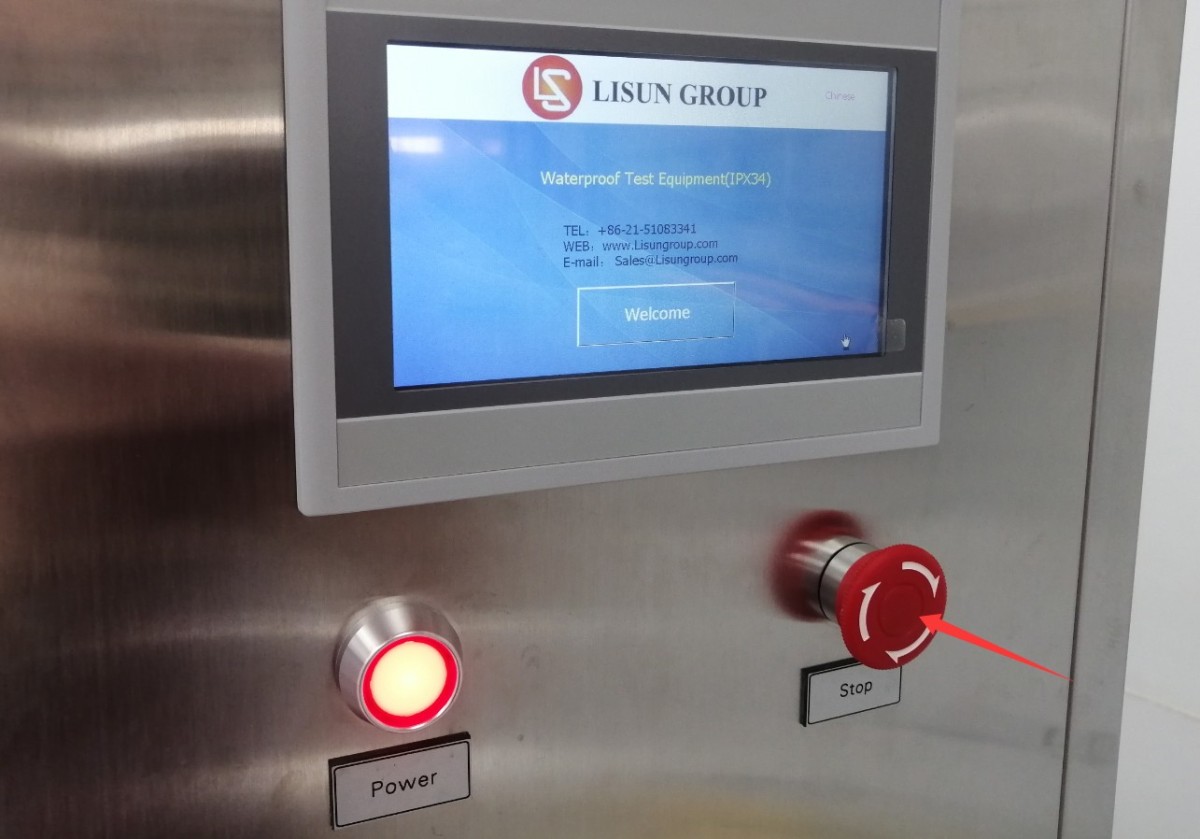
Рисунок 25
The swing-arm spray test is complete. Click “Back” to return.
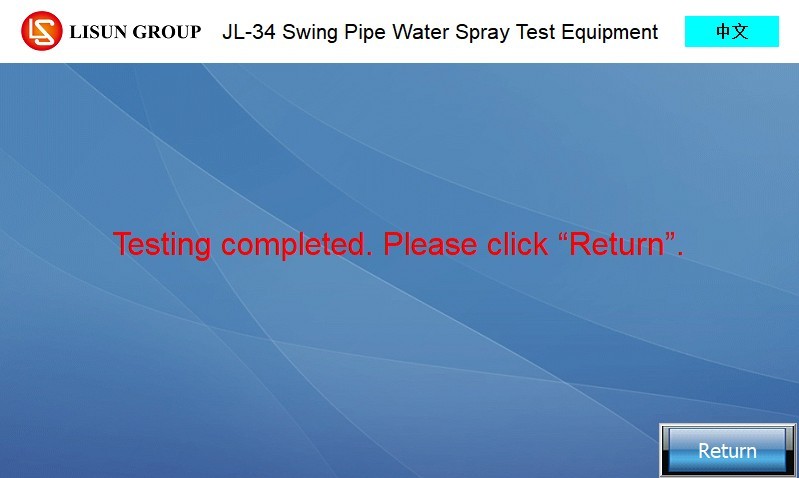
Рисунок 26
No water resistance rating has been selected. Please click “Back,” select the desired water resistance rating, and try again.
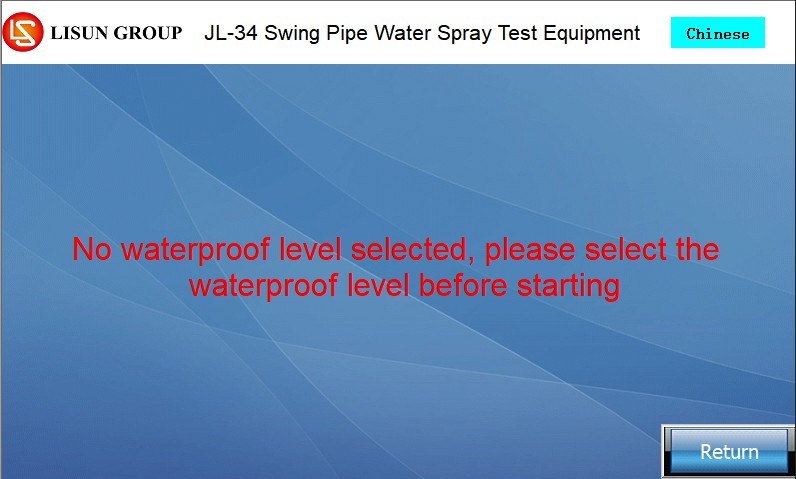
Рисунок 27
The test time has not been reset. Please click “Back,” then click “Reset” to clear the previous test data and try again.
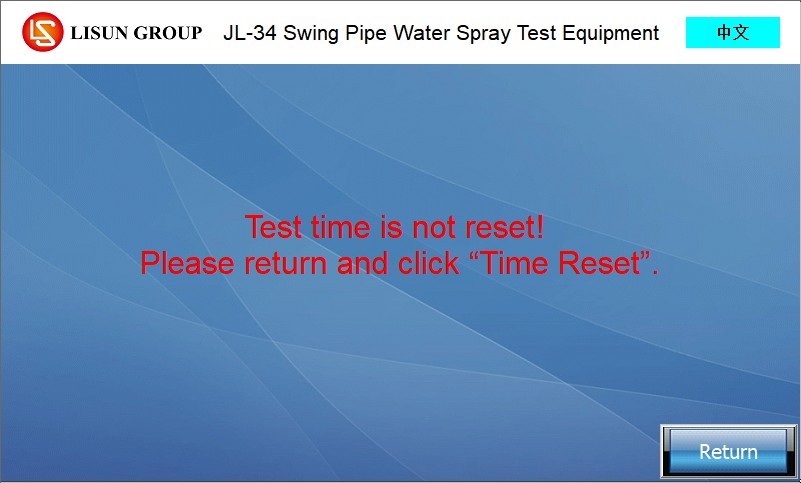
Рисунок 28
The swing arm has not been reset to zero. Please click “Back,” then click “Reset Swing Arm” to rotate the swing arm to the 0-degree position, and try again.
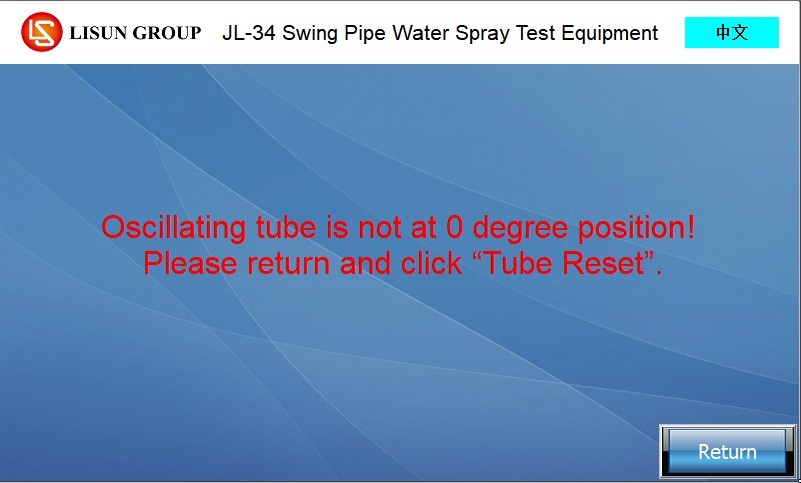
Рисунок 29
The water tank is overfilled. Refer to Section 3.3.2 to verify that the mechanical float is functioning properly, reset it, and lower the water level in the tank below the electronic float. Alternatively, check whether the upper-level electronic float is stuck; if it is jammed by debris, remove the debris and lower the float.
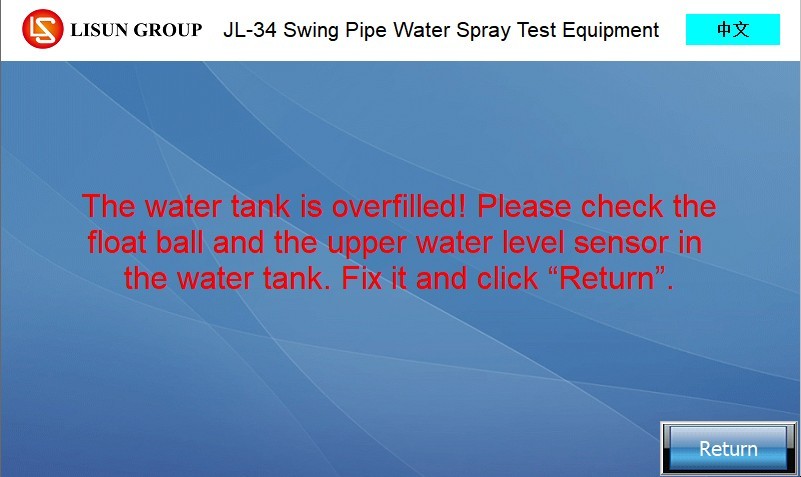
Рисунок 30
The water tank is low on water. Refer to Section 3.3.2 to verify that the water level in the tank is normal. Alternatively, check to see if the electronic float switch is stuck; if it is stuck due to debris, remove the debris and allow the float to rise. Tap “Back” to clear the alarm.
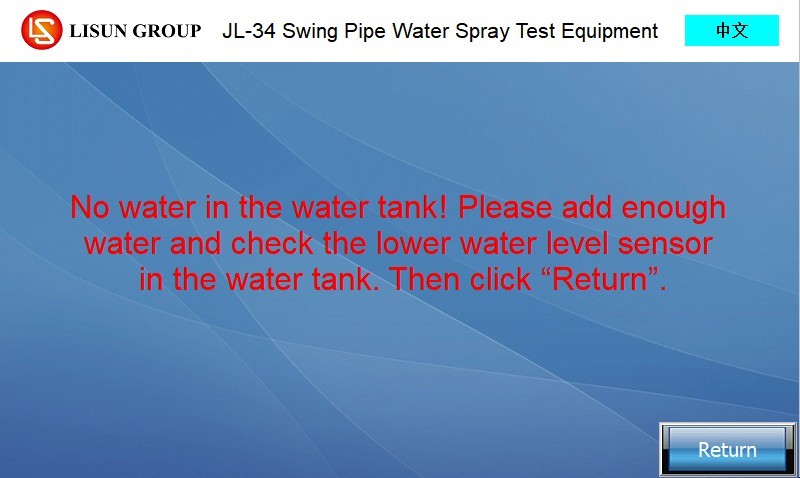
Рисунок 31
5. Подготовка к тесту
5.1 Пример установки
5.1.1 Preliminary Inspection of Samples
Inspect the sample to ensure it is in good condition, with no damage or deformation; verify the test requirements for the sample (whether power-on testing is required, and the water resistance rating); if power-on testing is required, refer to Section 3.2 to connect the sample’s power cord to an appropriate power source.
5.1.2 Sample Mounting and Positioning
Place the sample exactly in the center of the turntable and secure it firmly with a tie-down strap to prevent it from shifting or falling off while the turntable is rotating;
If the sample has any protruding parts, ensure that they will not collide with the swing arm to prevent damage to the equipment and the sample;
For electrical testing, follow the instructions in Section 3.2 to connect the sample using a waterproof plug, socket, and power cord. Check that the connection is secure, with no loose connections or short circuits, and verify that all connections in the circuit are properly sealed against water.
5.2 Matching and Commissioning of the Swivel Tube and Turntable
5.2.1 Calibration of the IPX3 Test Swing Arm
According to the requirements of GB/T 4208-2017, Section 14.2.3, IPX3 involves water spray within 60° arc segments on either side of the swing tube’s midpoint. The nozzles in the non-60° arc segments of the swing tube must be sealed with plugs, leaving only the nozzles within the 60° arc segments on either side of the midpoint (a total of 120° arc segment). Ensure that the seals are secure and free of leaks.
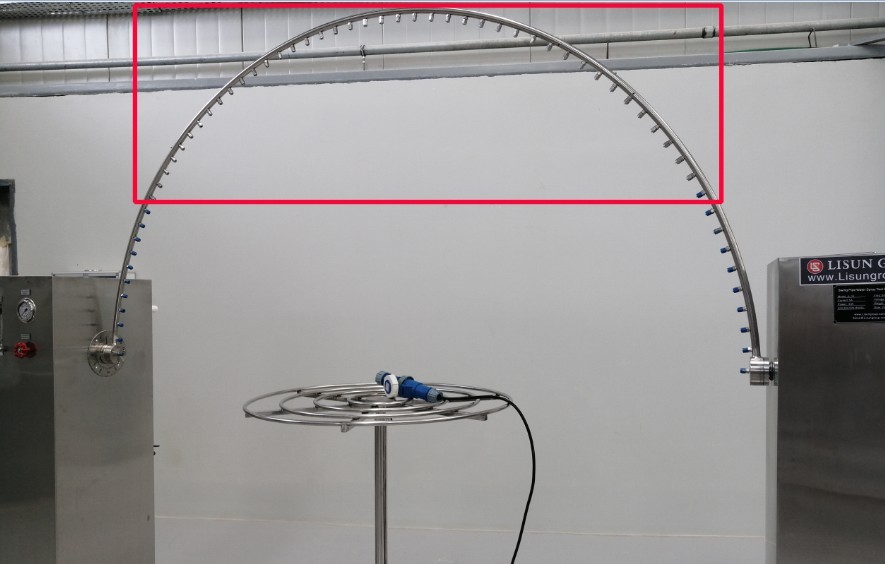
Рисунок 32
5.2.2 Calibration of the IPX4 Test Swing Arm
According to the requirements of GB/T 4208-2017 Section 14.2.4, the IPX4 test involves water spray within 180° arc segments on either side of the swing tube’s midpoint (approximately 360°). All plugs on the swing tube must be removed and replaced with nozzles; check that the nozzles are functioning properly andand ensure they are not clogged or loose.
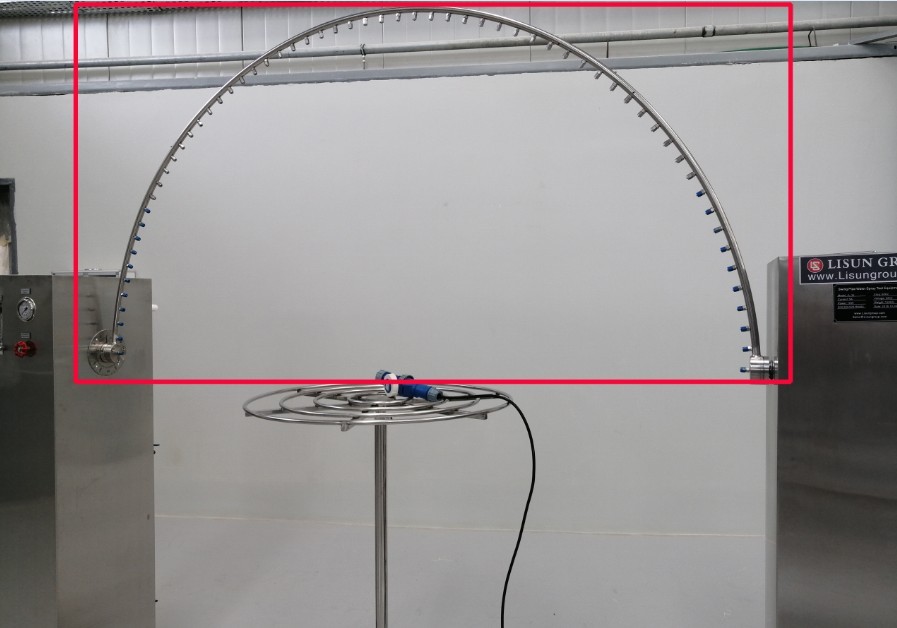
Рисунок 33
5.2.3 Turntable Height Adjustment
Manually adjust the turntable height according to the sample size so that the distance between the sample and the nearest point to the swing tube nozzle is ≤200 mm (in accordance with the requirements of Figure 4 in GB/T 4208-2017). After adjustment, lock the turntable height in place to prevent any height deviation during the test.
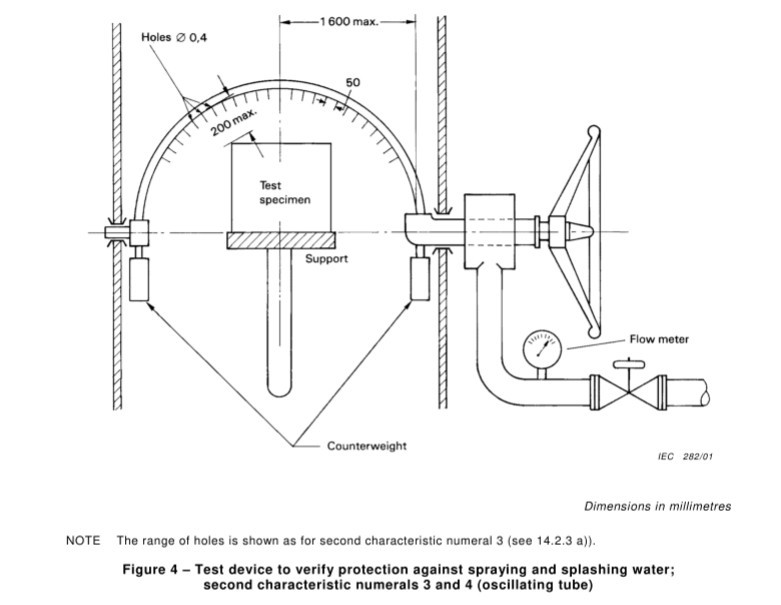
Рисунок 34
Note: Depending on the size of the sample, you may need to use different sizes of swing arms and turntables.
5.3 Pre-commissioning of Equipment
5.3.1 Equipment Functionality Check
If the equipment has not been used for an extended period, or if you need to verify in advance that all its functions are still operating normally, refer to Section 4.1.3 to check and confirm that the equipment’s pump, turntable, and swing pipe are functioning properly.
5.3.2 Needle Inspection and Flow Rate Pre-adjustment
Still referring to 4.1.3, turn on the water pump.
| № | Внимание |
| ① Flow Meter Adjustment | Adjust the water flow rate (L/min) to meet the standard requirements. Refer to Section 4.1.1; the working interface displays the standard water flow rate for the current settings, or you can refer to the water flow rate required for the standard calculation. |
| ② Water Pressure Adjustment | Standard specifications do not specify any water pressure requirements, so no adjustment is necessary. If specific standards require a certain water pressure, you can adjust it by turning this valve. |
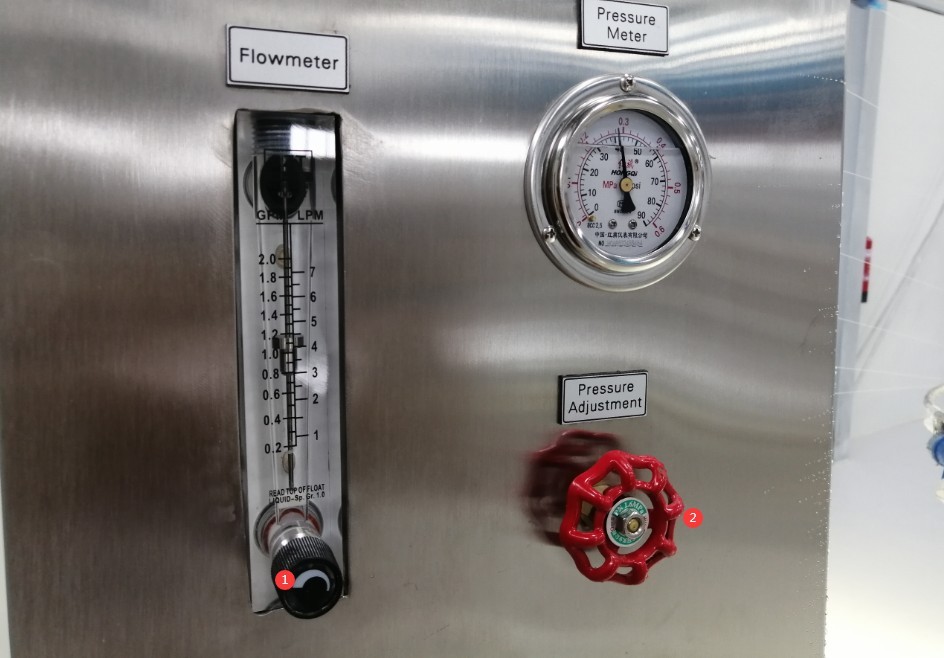
Рисунок 35
Note: Please ensure that water flows evenly from all nozzles. If any nozzles are clogged, you may not be able to adjust the water flow rate to meet the required standards. Use a nozzle cleaner to clear all nozzles, reinstall them, and then continue adjusting the water flow rate until it meets the standards.
Once commissioning is complete, you can turn off the pump.
6. Swivel-nozzle rain test
6.1 Тест запуска
On the touchscreen program interface, select the required waterproof rating. If the sample is powered, click “Sample Power,” then click “Clear and Reset” and “Pendulum Zero,” and finally click “Start Test” to begin the pendulum rain test.
6.2 The test is conducted automatically according to the standard settings.
6.2.1 IPX3 Oscillating Nozzle Rain Test
The pump starts, and the swing arm oscillates at a cycle of 120°/4 seconds. After 5 minutes of testing, the turntable automatically rotates the sample 90° horizontally, followed by another 5 minutes of testing. The total test duration is 10 minutes.
6.2.2 IPX4 Swivel Nozzle Rain Test
The pump starts, the swing arm oscillates at a rate of 350° per 12 seconds, and the turntable rotates at a constant speed of 1 r/min; the test continues for 10 minutes. The sample support has no water barrier, and the sample is exposed to water splashes from all directions.
6.3 Real-Time Monitoring of Tests
6.3.1 Water Spray from the Needle and Water Flow Rate
All nozzles delivered water evenly throughout the test, with no blockages. If the flow rate fluctuates during the test, the flow meter can be fine-tuned to keep the water flow rate stable at the standard rate.
6.3.2 Electrical Conditions of the Sample
Power to the sample is automatically turned on and off according to the set schedule. If an abnormality occurs during the test—such as a short circuit—the test can be stopped immediately; after inspecting the sample, the test can be repeated.
6.3.3 Other Exceptions
The swing angle of the swing arm is normal, with no jamming or unusual noises; the turntable rotates smoothly; the sample does not shift; and the program does not trigger any alarms. If any abnormalities occur, stop the test immediately, troubleshoot the issue, and then restart the test.
7. Процедуры после испытаний
7.1 Действия, которые необходимо предпринять сразу после завершения теста
7.1.1 Remove the sample
Press the “Stop Test” button, or wait for the test to end automatically. The swing arm will automatically return to the 0-degree position, the turntable will stop rotating, and power to the specimen will be cut off (for specimens undergoing powered testing). Remove the specimen from the turntable.
7.1.2 сенсорный экран
Check whether the test time display on the interface is working properly, then click “Clear and Reset” to prepare for the next test.
НИКОГДА не выключаться
After all tests for the day are completed, turn off the water supply valve and switch off the power to the equipment.
7.3 Оценка результатов испытаний
Use a dry cloth to wipe away any water stains from the sample’s outer surface, and then test the sample. Determine whether the sample passes the test based on the following criteria.
| Критерии оценки | Особые требования |
| Безопасность | Недостаточное водоснабжение не влияет на нормальную работу оборудования и не ставит под угрозу безопасность. |
| Изоляция Защита | Вода не скапливается на изолированных компонентах, где она могла бы вызвать обратные связи вдоль пути утечки. |
| Защита электрических компонентов | Вода не должна попадать в токоведущие части или обмотки, не предназначенные для работы во влажных условиях. |
| Защита кабеля | Вода не скапливается вблизи концов кабеля и не попадает внутрь кабеля. |
| Effectiveness of Drain Holes | Если имеются дренажные отверстия, необходимо убедиться, что поступающая вода не будет скапливаться и сможет стекать, не повреждая оборудование. |
| Equipment without drain holes | Если вода скапливается и представляет опасность для токоведущих частей, следует соблюдать критерии приемки, указанные в соответствующих стандартах на продукцию. |
8. Ежедневное техническое обслуживание и уход за оборудованием.
8.1 Ежедневная уборка
Wipe water spots and dust from the surface of the equipment, paying special attention to cleaning the turntable and swing arm areas to prevent water spots from forming limescale;
Wipe the touchscreen and control panel with a dry cloth to prevent water and dust from entering the internal circuitry;
Thoroughly clean the water tank at least once a week: Drain any standing water, then wipe it dry with a clean cloth. After cleaning, check the inner walls of the tank for rust or scale buildup. If there is minor rust, gently wipe it with a rust remover, then rinse thoroughly with clean water.
8.2 Регулярные проверки и замена
Needle: Check that the needle on the oscillating tube is not clogged, loose, or deformed, and verify that the water drips evenly. If the needle is clogged, use a needle cleaner to clear the blockage.
Connections: Check all connections on the swing pipe, water lines, and electrical circuits to ensure there are no leaks or loose connections.
Filter Cartridge: Inspect the filter cartridge inside the filter. If the cartridge has turned brown (indicating it is saturated with adsorbed impurities), replace it with a new one immediately.
8.3 Техническое обслуживание простаивающего оборудования
8.3.1 Кратковременный простой (в течение 1 месяца)
Drain all standing water from the water tank and water lines to prevent scale buildup on the needles and tubing;
Чтобы предотвратить попадание пыли, полностью накройте устройство пылезащитной тканью;
Храните оборудование в сухом, хорошо проветриваемом месте.
8.3.2 Длительная бездеятельность (более 1 месяца)
Complete all maintenance tasks for equipment that will be idle for a short period; disconnect all electrical and water connections from the equipment; remove the water hoses, let them air dry, and store them properly;
Apply a layer of rust-preventative oil to the inner walls of the water tank and the surfaces of metal parts to prevent rust; store the equipment in a cool, dry place away from direct sunlight;
Apply a small amount of industrial lubricant to moving parts, such as turntable bearings, to prevent rust and seizing;
The equipment should be powered on once a month. Switch to the manual screen to test all functions, then shut it down after 5 to 10 minutes of operation to prevent circuit deterioration.
9. Устранение неполадок и решение распространенных проблем
| Признаки неисправности | Возможные причины | Метод |
| Сенсорная сигнализация | См. 4.2 | |
| The touchscreen is lit, but the buttons do not respond when tapped | Сенсорный экран зависает, на его поверхности появляются пятна или следы воды, неисправен внутренний сенсорный модуль. | Turn off the device, wait 5 minutes, and then restart it; wipe the touchscreen with a dry cloth to remove stains or water marks; if it still does not respond, contact us for repair. |
| The water flow from the needle is uneven. | Tilted cabinet, clogged needle, insufficient water flow | Use a level to ensure the cabinet is vertical and not tilted; use a drain snake to clear any clogs in the drain line; ensure that the water flow meets the specified requirements. |
| The water flow is insufficient and cannot be increased. | Clogged needle, clogged filter cartridge, clogged water pump | Use a cleaning needle to unclog the nozzle that isn’t dispensing water; replace the filter cartridge; disassemble the water pump, clean out the internal debris, and reassemble it. |